

Why Frozen Pipes Are a Serious Risk
Water expands as it freezes - by roughly 9 percent in volume. Inside a rigid pipe, that expansion generates enormous pressure, enough to split copper, crack PVC, and burst even metal fittings. The freeze itself may cause no visible damage, but when the pipe thaws, pressurized water can escape into walls, ceilings, and floors in significant quantities before anyone notices.
Pipes most at risk are those in unheated spaces - crawl spaces, garages, and attics - and those running along exterior walls with little insulation between them and the outside air. Even a small gap in a foundation wall or around a pipe penetration can funnel enough cold air to freeze a nearby pipe on a bitter night.
Taking a couple of hours in the fall to work through the steps below can prevent repairs that often run into thousands of dollars. This task fits well within a broader fall maintenance window - see our month-by-month home maintenance calendar for how it fits alongside other seasonal tasks.
Know Your Main Shut-Off Valve
If a pipe freezes and bursts, the single most important action you can take is shutting off your home's main water supply immediately. Locate this valve now - it is typically near the water meter, in the basement, or in a utility closet. Make sure every adult in the household knows where it is and how to operate it. Delaying even a few minutes can result in thousands of dollars of water damage.
What You'll Need
Most winterization tasks require only basic materials available at any hardware store. Gather the following before you begin working through the steps:
What you will need
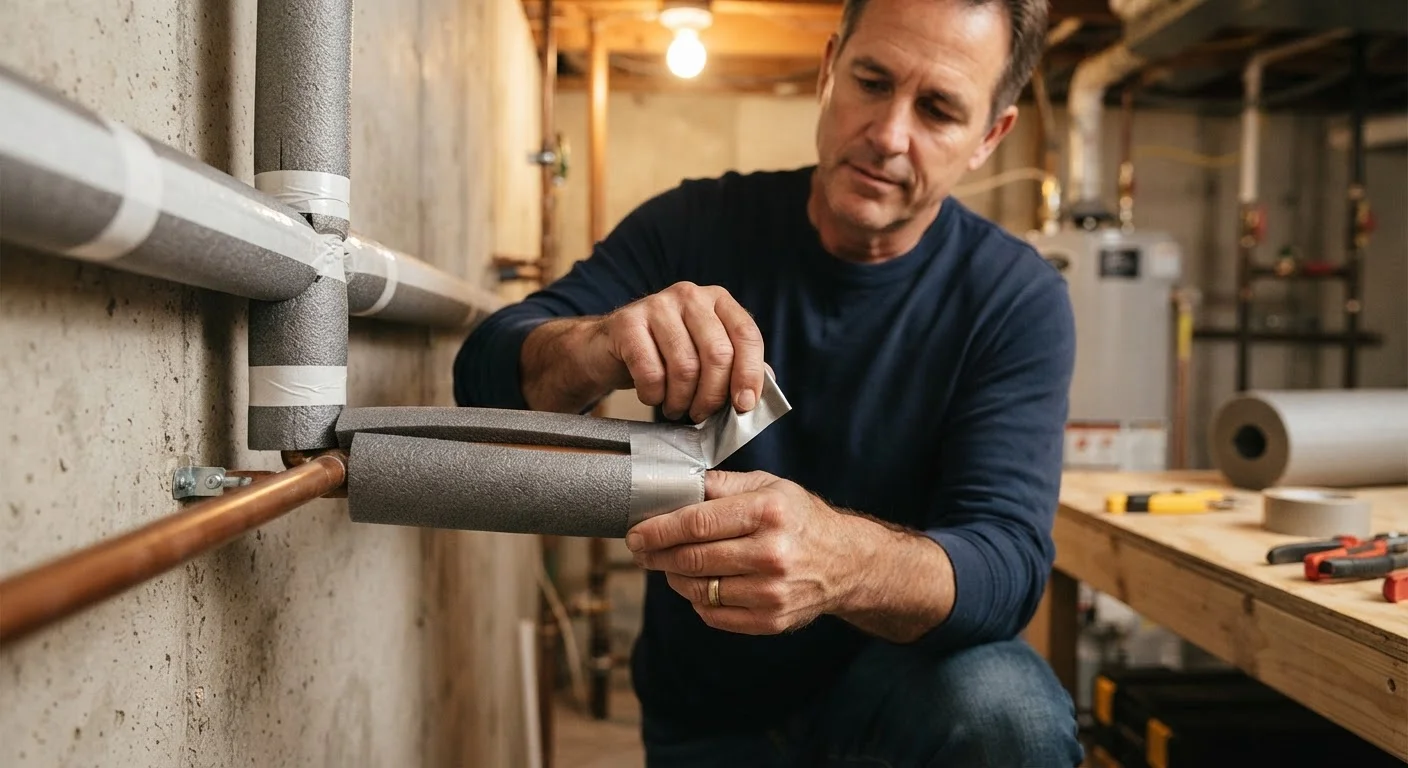
Pipe insulation foam sleeves
Wrap exposed pipes in unheated areas to slow heat loss and reduce freezing risk.
Outdoor faucet covers (insulated)
Insulate exterior hose bibs after disconnecting hoses to protect them from freezing.
Plumber's heat tape (electric)
Provide active warmth to pipes in extremely cold or hard-to-insulate locations.
Caulk or expanding foam sealant
Seal gaps and cracks near pipes where cold air drafts enter from outside.
Flashlight
Illuminate pipes in dark crawl spaces, basements, and behind cabinets during inspection.
Step-by-Step: Winterizing Your Plumbing
Work through these steps before the first forecast of sustained freezing temperatures in your area. In northern US climates, that typically means completing winterization by mid- to late autumn.
Disconnect and drain all outdoor hoses
Detach garden hoses from every exterior spigot (hose bib). Water left in a connected hose can freeze, expand back into the pipe, and crack the bib or the supply line behind it. Once disconnected, drain each hose fully and store it in a garage or shed.
Shut off and drain interior shut-off valves for outdoor faucets
Most homes built after the 1980s have an interior shut-off valve for each outdoor faucet, typically found in the basement or crawl space near the exterior wall. Turn that valve clockwise to close it, then go outside and open the faucet to let any remaining water drain out completely. Leave the outdoor faucet handle in the open position so residual pressure can escape.
Install insulated faucet covers on exterior hose bibs
Even after shutting off the interior valve, fitting an insulated dome cover over each exterior faucet adds a useful layer of protection against wind chill and extreme cold snaps. These covers fasten with a simple drawstring or strap and take less than a minute to install.
Insulate exposed pipes in unheated spaces
Inspect your basement, crawl space, attic, and garage for any pipes that are exposed and uninsulated. Foam pipe sleeves - available in standard pipe diameters - slide directly over the pipe and tape closed at seams. Pay particular attention to pipes running along exterior walls or in corners where outside air is coldest.
For pipes in extremely vulnerable locations, electric heat tape (also called heat cable) can be wrapped around the pipe before adding foam insulation. Always follow the manufacturer's installation instructions carefully; improper installation of heat tape is a fire hazard.
Seal air leaks near pipes
Cold drafts dramatically increase freezing risk. Use caulk or expanding foam sealant to close gaps around pipe penetrations through walls, floors, and the foundation sill plate. Check where cables and wires enter the home as well - any opening large enough for cold air is worth sealing.
Keep interior temperatures consistent
If you lower the thermostat at night or when leaving home, avoid going below 55°F (13°C) - even in vacant properties. Pipes inside cabinets on exterior walls (common under kitchen and bathroom sinks) can be protected by leaving cabinet doors open to allow warm room air to circulate around them during a cold snap.
Drain and winterize irrigation systems and secondary water lines
In-ground sprinkler systems must be fully drained or blown out with compressed air before freezing weather. This is typically a job for a licensed irrigation professional, since improper blow-out pressure can damage system components. Drain any outdoor showers, fountain lines, or secondary water features the same way - shut off the supply and open drain plugs or low-point drain valves.
Never Use an Open Flame to Thaw Pipes
If a pipe does freeze, do not attempt to thaw it using a propane torch, open flame, or any high-heat source. This is a significant fire hazard and can damage pipe materials. Safe thawing options include a hair dryer on low heat, warm towels, or a portable space heater placed nearby - always starting from the faucet end and working back toward the cold section. If you cannot locate or safely access the frozen section, call a licensed plumber.
After Winterization: Ongoing Cold-Weather Habits
Winterization is not entirely a one-time task - a few habits throughout the cold season help maintain your work:
- Monitor the forecast. When overnight temperatures are forecast below 20°F (-7°C), open under-sink cabinet doors on exterior walls and let interior faucets drip slightly to keep water moving in vulnerable lines.
- Check crawl space vents. Some older homes have vented crawl spaces. While these should generally remain open year-round for moisture control, confirm that any pipes in the crawl space are well-insulated before temperatures drop sharply.
- Inspect heat tape annually. Electric heat tape degrades over time. Check it for cracked insulation, kinks, or damage each fall before plugging it in.
If you are new to home ownership, this is one of many maintenance tasks that benefit from a broader understanding of your home's systems. Our guide for first-time homeowners covers the fundamentals in accessible detail.
Add This to Your Annual Home Calendar
Plumbing winterization fits naturally into a broader seasonal maintenance routine. Tasks like checking weatherstripping, servicing your heating system, and cleaning gutters often share the same autumn window. Grouping them together saves time and ensures nothing is overlooked before cold weather sets in.
Staying ahead of seasonal tasks - from plumbing to gutters to heating - is the most reliable way to avoid costly emergency repairs. Our seasonal home maintenance checklist can help you track what needs attention each quarter.
The content provided on our blog site traverses numerous categories, offering readers valuable and practical information. Readers can use the editorial team’s research and data to gain more insights into their topics of interest. However, they are requested not to treat the articles as conclusive. The website team cannot be held responsible for differences in data or inaccuracies found across other platforms. Please also note that the site might also miss out on various schemes and offers available that the readers may find more beneficial than the ones we cover.