

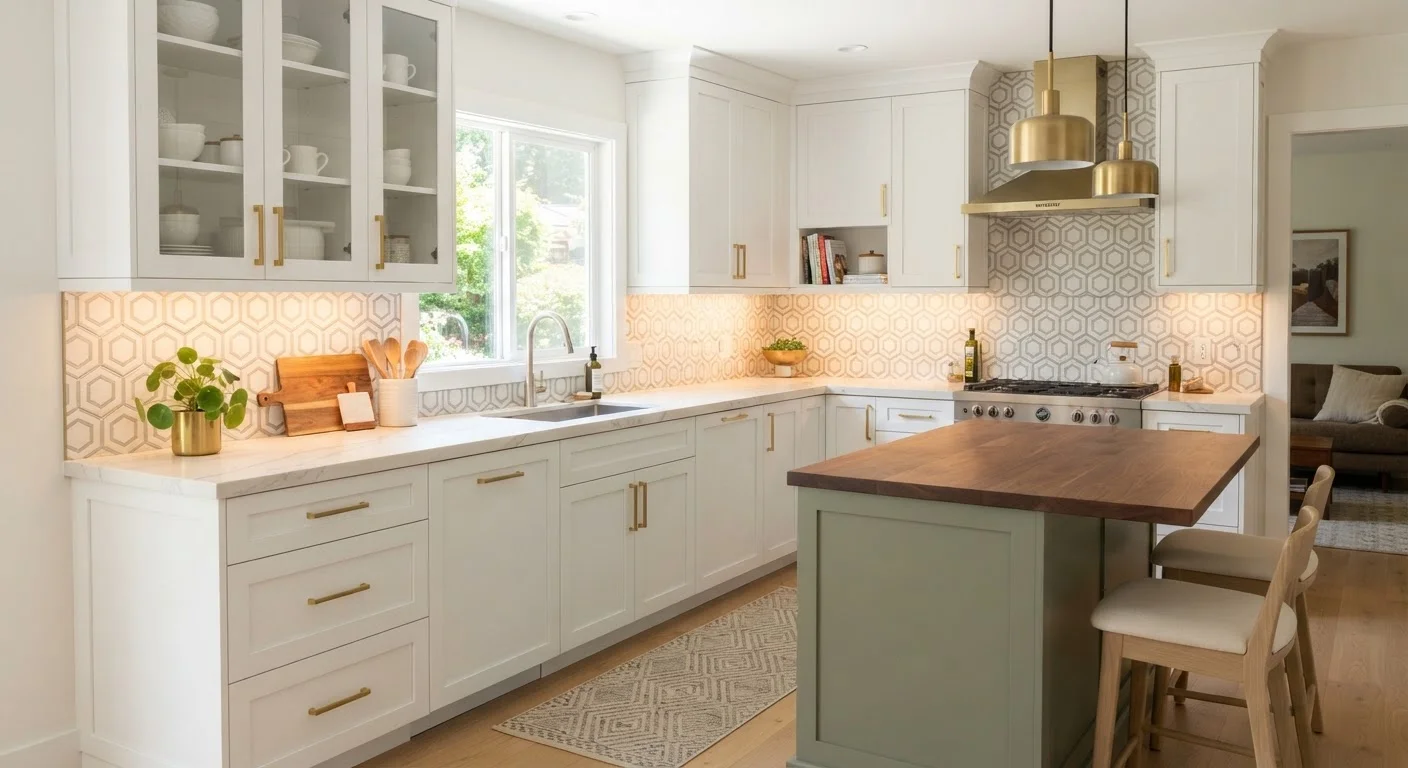
Why a Refresh - Not a Renovation - Often Makes Sense
A full kitchen gut renovation - removing cabinets, retiling floors, relocating plumbing - routinely runs into tens of thousands of dollars and weeks of household disruption. For families whose kitchen bones are structurally sound but visually dated, targeted cosmetic updates often deliver a comparable sense of transformation at a fraction of that cost and timeline.
The key distinction is understanding what cosmetic work can and cannot accomplish. A refresh improves appearance, function of surfaces, and the feel of the space. It does not address underlying plumbing, electrical capacity, or cabinet-box damage. Before beginning any project, spend time assessing what you actually have: open cabinet doors, check hinges and drawer slides for function, look for soft spots near the sink that might indicate water intrusion.
For a broader picture of how cosmetic improvements compare with structural ones at resale, see the research on home improvement resale impact. And if you are weighing DIY versus hiring out, review the hidden costs of DIY home improvement before committing to a plan.
~$1,500-$4,000
Typical cost range to paint existing kitchen cabinets
Industry estimates from remodeling cost surveys suggest professional cabinet painting runs significantly less than full replacement, which can exceed $15,000-$30,000 for an average kitchen.
70-80%
Portion of kitchen impact driven by cabinets and lighting
Design professionals commonly note that cabinets and lighting together dominate first impressions in a kitchen, making them the highest-leverage surfaces to address in a refresh.
Painting Cabinets: The Highest-Impact Single Project
Of all the no-demo updates available to a kitchen, painting existing cabinet boxes and doors reliably produces the most dramatic visual change. The process is labor-intensive but achievable for a patient DIYer over two or three weekends.
Preparation Is Everything
Remove all doors, drawers, and hardware before painting. Clean surfaces thoroughly with a degreaser - kitchen cabinets accumulate cooking grease that will cause paint to peel if not removed. Lightly sand all surfaces to give the new finish mechanical adhesion, then prime with a bonding or shellac-based primer rated for previously finished surfaces.
Apply paint in thin, even coats using a foam roller for flat panels and a fine-bristle brush for edges and profiles. Two to three coats of a cabinet-specific alkyd or water-based enamel will produce a hard, durable finish. The same preparation discipline that makes cabinet painting succeed applies to all interior painting - see what professionals do that most DIYers skip for prep techniques that carry over.
Always label the back of each cabinet door with its location (e.g., 'upper left, door 1') before removing them. Rehinging out-of-order adds hours of adjustment work.
Cabinet hinges and frames settle into alignment over time; swapping doors between openings often means recalibrating European-style concealed hinges from scratch.
Apply a very light scuff with 220-grit sandpaper between your final two coats of cabinet paint - even if the surface looks smooth. This eliminates micro-raised grain that becomes visible under direct light.
Water-based enamels raise wood grain slightly with each coat; a quick inter-coat scuff and wipe produces a glass-smooth final surface that holds up to daily cleaning.
Allow full cure time - typically 7-14 days for water-based enamels - before rehinging doors and returning items to shelves. Rushing this step is the most common cause of surface damage.
Hardware Swaps: Small Change, Big Visual Shift
Cabinet pulls and knobs are among the least expensive elements in a kitchen and among the easiest to update. A consistent hardware finish - brushed nickel, matte black, unlacquered brass - ties updated cabinetry together and signals intentionality even in a modest space.
Before purchasing replacements, measure the center-to-center distance on existing pulls (the span between the two screw holes). Standard measurements are 3 inches and 3¾ inches for pulls; knobs are single-hole and universally interchangeable. Matching this measurement means existing holes can be reused without drilling. If you want a different pull size, you will need to fill old holes with wood filler, sand flush, touch up paint, and drill new pilot holes - a manageable but additional step.
Buy One Extra Pull Before Committing
Order a single pull or knob sample before purchasing the full quantity needed for your kitchen. Hold it against your cabinet color and countertop in natural daylight - finishes that look cohesive online sometimes clash in person. This small step prevents a costly return and reorder.
Lighting Updates That Change How a Kitchen Feels
Kitchen lighting is frequently overlooked in refresh planning, yet it affects how clean, large, and welcoming the space feels more than almost any surface change. Most dated kitchens rely on a single overhead fixture that casts uneven light and creates shadows on countertops directly below upper cabinets.
Under-Cabinet Lighting
Plug-in or hardwired LED strip lights installed beneath upper cabinet boxes illuminate countertops directly, improving both task lighting and the visual warmth of the space. Plug-in options require only an accessible outlet and involve no electrical work; hardwired versions offer a cleaner look but should be handled by a licensed electrician if you are not confident working with wiring.
Replacing Overhead Fixtures
Swapping an outdated flush-mount fixture for a semi-flush or pendant-style fixture is a straightforward swap if the ceiling box is already rated for the new fixture's weight. Turn off power at the breaker and verify with a non-contact voltage tester before touching any wiring. If you are unsure about any step of an electrical swap, consult a licensed electrician - this is not a task to rush.
Electrical Work: Know Your Limits
Replacing a light fixture involves working with household wiring. Always turn off the circuit at the breaker panel and confirm power is off using a non-contact voltage tester before touching any wires. If the existing ceiling box is not rated for the weight of a new fixture, or if you encounter unfamiliar wiring configurations, stop and consult a licensed electrician. Improper electrical work is a leading cause of residential fires.
Backsplash Updates: Tile, Peel-and-Stick, and Paint Options
The backsplash zone - the wall area between countertops and upper cabinets - is a contained, manageable canvas for a visual refresh. Three approaches suit different budgets and skill levels.
Ceramic or Glass Tile
Traditional thin-set tile installation is the most durable option and produces a result indistinguishable from new construction. The process involves removing the existing backsplash material (or installing over it with added depth), applying tile using mastic adhesive or thin-set mortar, and grouting the joints once adhesive cures. For guidance on keeping grout and caulk in good condition after installation, see keeping wet areas watertight.
Peel-and-Stick Panels
Peel-and-stick backsplash products have improved considerably in recent years. They adhere best to clean, flat, painted drywall or existing smooth tile. They are a genuinely reversible option, making them well suited to renters or households that may update the space again in a few years. Heat and steam near the range can reduce adhesion over time - keep this in mind when planning placement.
Paint
A backsplash zone painted in a semi-gloss or tile-specific paint (with a topcoat sealer) is the lowest-cost option and works well in lower-humidity areas of the kitchen. It will not hold up as well directly behind a busy cooking surface.
Sequencing Your Projects and Setting Realistic Expectations
Doing refresh projects in the wrong order creates unnecessary rework. A logical sequence protects each completed surface and keeps the project moving efficiently.
- Lighting first: Any ceiling or under-cabinet fixture work that involves cutting, patching, or painting should happen before cabinet painting begins.
- Cabinet painting second: Complete all cabinet prep, priming, and finish coats before installing new hardware.
- Backsplash third: Tile or panel work is installed after cabinets are painted, so that adhesive or grout can be cut cleanly to the cabinet edge.
- Hardware last: New pulls and knobs go on once paint has fully cured and the backsplash is complete.
Set honest expectations about timeline. A full weekend of cabinet painting prep, a week of cure time, a second weekend for top coats, and another week before rehinging - this is a three-week project minimum when done carefully. Families with young children or heavy kitchen use should plan for temporary inconvenience and stage the work around it.
For additional weekend-scale projects that complement a kitchen refresh, the weekend projects guide covers improvements that make a real difference in everyday comfort. General upkeep resources are also available through the Home Maintenance hub.
Permits Are Rarely Required for Cosmetic Work
Painting, hardware replacement, and peel-and-stick backsplash installation do not typically require building permits. However, hardwired lighting changes may require an electrical permit depending on your local jurisdiction. When in doubt, contact your local building department before starting - requirements vary by municipality and the stakes of non-compliance can affect homeowner's insurance.
The content provided on our blog site traverses numerous categories, offering readers valuable and practical information. Readers can use the editorial team’s research and data to gain more insights into their topics of interest. However, they are requested not to treat the articles as conclusive. The website team cannot be held responsible for differences in data or inaccuracies found across other platforms. Please also note that the site might also miss out on various schemes and offers available that the readers may find more beneficial than the ones we cover.